
Mac CAC reader setup has gotten complicated with all the macOS versions and certificate requirements flying around. As someone who’s configured CAC access on everything from beat-up MacBook Airs to brand new M3 MacBook Pros, I learned everything there is to know about making your Mac play nice with DoD systems. Today, I will share it all with you.

Quick Answer: Mac CAC setup involves four main steps: getting a compatible USB reader, installing DoD certificates through Keychain Access, configuring your browser, and testing on a DoD site. Plan for about 30-45 minutes if it’s your first time.
Mac Requirements and Compatibility
System Requirements
You’ll need macOS 10.12 (Sierra) at minimum, but honestly, if you’re not on Ventura (13) or Sonoma (14), update before you do anything else. The newer macOS versions have significantly better native smart card support, and you’ll save yourself a pile of headaches.
Both Intel and Apple Silicon Macs (M1, M2, M3) work. RAM and storage aren’t really a concern — the certificates and software take up about 100MB total, which is nothing.
Compatible Readers for Mac
Not every reader works smoothly on macOS. Based on MilitaryCAC.com’s compatibility guide and my personal testing, these are the ones I recommend:
- ZOWEETEK USB-C CAC Reader ($10.90) — Best for newer MacBooks with USB-C ports. No adapter needed, which is a big deal.
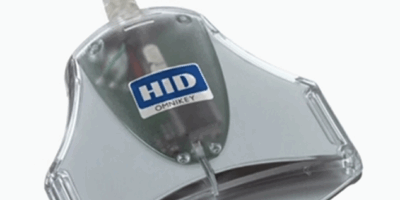
- Identiv SCR3310v2.0 ($14.07) — The DoD standard. Requires a USB-A to USB-C adapter on newer Macs, but rock solid once connected.
- Dual Connector CAC Reader ($10.99) — Has both USB-A and USB-C built in. Nice option if you switch between machines.
- Identiv SCR3500 Smartfold ($27.05) — Ultra-portable folding design. Great for traveling with your MacBook.
Check Your CAC Type
Before you start, flip your CAC over and look at the chip. The MilitaryCAC.com guide lists 7 approved chip types that work with Mac. Most cards issued in recent years are fine, but it’s worth checking if you have an older card.
Step 1: Hardware Setup
Probably should have led with this section, honestly. Plug your reader directly into a USB port on your Mac — avoid hubs if possible, at least for initial setup. Then verify your Mac sees it:
- Hold the Option key and click the Apple menu
- Select “System Information”
- Navigate to Hardware, then USB
- Your reader should show up in the device tree
Insert your CAC card and check the Smart Cards section in System Information. If both the reader and card show up, your hardware is good.
If the reader doesn’t appear: try a different USB port, restart your Mac, and if it’s a USB-A reader through an adapter, try a different adapter. Some cheap adapters don’t deliver enough power.
Step 2: Install DoD Root Certificates
This is the step that makes or breaks your setup. Without these certificates, your browser won’t trust any military website and you’ll get scary-looking security warnings.
Per the DoD Cyber Exchange official guidance, here’s what to download and install:
- Go to militarycac.com/dodcerts.htm
- Download these files: AllCerts.p7b (the complete bundle), plus RootCert3.cer, RootCert4.cer, RootCert5.cer, and RootCert6.cer individually
Import Into Keychain Access
- Open Keychain Access (Cmd+Space, type “Keychain Access,” or find it in Applications, Utilities)
- Go to File, then Import Items
- Select the AllCerts.p7b file you downloaded
- Install to the “System” keychain — not “login,” not “Local Items,” the “System” one
- Repeat for each of the individual RootCert .cer files
Set the Trust Settings
That’s what makes this step endearing to us Mac users — once you set the trust properly, it usually just works from then on.
- In Keychain Access, select the System keychain
- Find “DoD Root CA 3,” “DoD Root CA 4,” “DoD Root CA 5,” and “DoD Root CA 6”
- Double-click each one, expand the Trust section
- Set “When using this certificate” to “Always Trust”
- Enter your admin password to save each change
Step 3: Browser Configuration
Safari (Recommended)
Safari integrates natively with Keychain Access, so there’s usually nothing extra to configure. Once your DoD certs are installed and trusted, Safari picks up your CAC certificates automatically. This is why I recommend Safari for Mac CAC users — less fiddling.
Per the DoD Cyber Exchange browser guidance, Safari offers the best integration on macOS.
Chrome
Chrome also uses the macOS Keychain for certificates. Go to Settings, Privacy and Security, Security, then Manage certificates to verify smart card authentication is enabled. In most cases, Chrome works without extra steps once the system certs are in place.
Firefox (More Setup Required)
Firefox uses its own certificate store, which means extra work. You’ll need to install CACKey middleware and configure the PKCS#11 security module. The MilitaryCAC.com Mac guide has the Firefox-specific steps. Honestly, unless you have a specific reason to use Firefox, just use Safari.
macOS Version Notes
Ventura (13) and Sonoma (14)
Per the official Ventura+ guide, these newer versions have robust native smart card support. No third-party CAC enablers needed. The enhanced security features might prompt a few extra dialogs during setup, but the end result is more stable than older macOS versions.
Older macOS (10.12 through 12.x)
You might need the Smart Card Services package from Apple. Additional configuration steps may apply. Honestly, if you can update to Ventura or Sonoma, do it. The older setup process is more painful and less reliable.
Step 4: Test Your Setup
- Visit militarycac.com/testcac.htm
- A certificate selection dialog should pop up
- Choose your DoD certificate
- Enter your PIN when prompted
- If the test page confirms authentication, you’re good
Then test with an actual DoD website your organization uses. Verify the PIN prompt appears, login succeeds, and everything functions normally.
Troubleshooting
“Certificate not trusted” errors
Reinstall the DoD root certificates and double-check that each Root CA is set to “Always Trust” in Keychain Access. Then clear your browser cache and cookies. This fixes it 90% of the time.
“No certificate found” errors
Clean your CAC card’s gold contacts with a microfiber cloth. Verify the reader connection in System Information. Try restarting your Mac with the CAC inserted.
Safari not recognizing CAC
Reset Safari (Safari menu, Clear History and Website Data). Also check System Preferences, Security & Privacy to make sure apps from identified developers are allowed.
Reader not detected
Try a different USB port. Avoid USB hubs. Check System Information for the device. Download reader-specific drivers from the manufacturer’s site if the generic macOS driver isn’t recognizing your model.
Security Best Practices
- Never leave your CAC in the reader when you walk away
- Never share or write down your PIN
- Configure your Mac to lock when the CAC is removed (System Preferences, Security & Privacy)
- Keep macOS and your browsers updated
- Clean your card contacts monthly
- Verify certificate expiration dates quarterly
Apple Silicon (M1/M2/M3) Specific Notes
When Apple switched to their own processors, it broke a lot of CAC setups that relied on Intel-era kernel extensions. The good news: macOS Ventura and Sonoma on Apple Silicon have native smart card support that’s actually better than what Intel Macs had. The old TokenD system is gone, replaced by CryptoTokenKit, which is faster and more stable.
If you migrated from an Intel Mac to an Apple Silicon Mac using Migration Assistant, you might have leftover TokenD files in /Library/Security/tokend/ that can interfere with CryptoTokenKit. Delete any files in that directory and restart. This alone has fixed stubborn “no certificates found” issues for several people I’ve helped.
USB-C adapters work fine for USB-A readers on Apple Silicon Macs, but spring for a decent adapter. The ultra-cheap ones sometimes don’t deliver enough power to the reader, and you’ll chase ghost connectivity issues for hours before realizing the adapter is the problem.
Enterprise Deployment on Mac
If you’re an admin deploying CAC access across a fleet of Macs, consider using MDM (Mobile Device Management) configuration profiles to push DoD certificates instead of installing them manually on each machine. You can create a profile that installs the root certs, sets trust levels, and configures smart card behavior — then deploy it to every Mac in your organization at once.
Scripting certificate installation via Terminal is also an option for smaller deployments. The security command-line tool in macOS can import certificates into Keychain, and you can wrap the whole process in a bash script that runs on first login.
Advanced: Command Line Verification
For those comfortable with Terminal:
# Check smart card status
sc_auth list

# View available card slots
pkcs11-tool --list-slots

# Verify DoD root certificates installed
security find-certificate -a -c "DoD Root CA"
Official Resources
- DoD Cyber Exchange: Official PKI guidance and certificates
- MilitaryCAC.com Mac Guide: Comprehensive community-maintained instructions
- MilitaryCAC.com Ventura+ Guide: Latest macOS-specific instructions
- MilitaryCAC.com Certificate Downloads: Direct links to required certificates
- MilitaryCAC.com CAC Test Page: Verify your installation works
Recommended CAC readers for Mac users:
- MacBook Air/Pro (USB-C): ZOWEETEK USB-C CAC Reader ($10.90)
- Maximum compatibility: Identiv SCR3310v2.0 ($14.07)
- Universal solution: Dual Connector Reader ($10.99)


Subscribe for Updates
Get the latest articles delivered to your inbox.
We respect your privacy. Unsubscribe anytime.